🚀 CMD One-Click Installation & Cloudflare Deployment Guide
This guide explains the easiest and safest way to build the Cloudflare edge infrastructure and deploy/sync both the admin and blog apps simultaneously by running a single automation command (npm run setup) in a terminal (CMD or PowerShell) environment.
🛠️ 1. Introduction to One-Click Deployment Automation
The SvelteKit blog engine has fully automated the complex process of server resource creation and configuration file editing through an interactive setup tool in the terminal.
After unpacking the blog source code or downloading it to your computer via git clone, open the terminal, navigate to the project root folder, and run the following commands in sequence:
# Install required packages
npm install
- Dependency Library Installation: Enter
npm installin the terminal to install all required packages. If a security warning (vulnerabilities) message appears in the terminal after installation is complete, it is recommended to enter thenpm audit fixcommand to safely apply the latest security patches.
Once the package installation is complete and you run npm run setup, the following processes will be handled automatically according to the terminal prompts:
- Easy Cloudflare Account Authentication: Link your deployment account with a single click.
- Create DB and Storage Resources: Automatically create 2 D1 databases dedicated to the blog and a KV store for storing images.
- Real-time Configuration File Update: Detect the unique IDs of the created databases and automatically inject them into the monorepo configuration files (
wrangler.json). - Database Seed Data Injection: Create tables and automatically register sample posts and basic configuration information according to the selected default language.
- Upload Secrets and Allowed IP: Automatically transmit the deployer's current public IP address (
ALLOWED_IP) and password environment variables to the cloud for admin access. - Integrated Build & Web Service Deployment: Bundle both the blog and admin SvelteKit projects and immediately deploy them to Cloudflare Pages.
📋 2. Pre-deployment Checklist
Please make sure all of the following are prepared before starting the safe installation:
- Install Node.js: Node.js (version 22 or higher) must be working on your computer.
- Cloudflare Account: A Cloudflare account (the free tier is sufficient) is required to host the blog site and databases.
- Create Secret Environment Variable Files (.dev.vars) (Required):
- Before starting deployment, you must manually create a
.dev.varsfile in each of theapps/admin/andapps/blog/folders. - In the
apps/admin/.dev.varsfile, writeADMIN_PASSWORD=YourAdminLoginPassword. - In the
apps/blog/.dev.varsfile, writeBETTER_AUTH_SECRET=ArbitraryStringOfYourChoice. [!WARNING]
If these environment variables are not set, the installation tool will stop immediately for correct operation upon runningnpm run setup.
- Before starting deployment, you must manually create a
⚙️ 3. Step-by-Step Guide for npm run setup
Open the terminal, type npm run setup in the blog project root directory, and press Enter.
Step 0. Secrets Pre-Validation
- Immediately upon execution, it checks if the
.dev.varsfiles and the required secret variables (ADMIN_PASSWORD,BETTER_AUTH_SECRET) are entered in the admin and blog folders. - If any value is missing, the guide log is displayed and the script exits, so please make sure to fill them in advance.
Step 1. Configure Deployment Project Name (Domain URL)
- This step defines the URL that readers will use to access your blog (e.g.,
[entered-project-name].pages.dev). - It takes two names: one for the blog and one for the admin app. If running in restore mode (
--restore), it automatically reads the existing names from the backup configuration file (wrangler.backup.json).
Step 2. Cloudflare Account Authentication
- Verifies Cloudflare authentication. If you have logged in previously, it automatically detects the session and skips this step.
- If you are not logged in, a browser window will open showing the authentication request screen. Click [Allow] to approve the account integration.
- Security Information: This automation tool only requests the minimum account API permissions required for infrastructure creation and deployment, so you can proceed with confidence.
Step 3. Resource Creation & Configuration Binding
- This step creates the database and media storage in the cloud for the actual service to run. Look at the prompts in the terminal and enter the appropriate number.
1(Fresh Install): Completely deletes previously created databases and storage and recreates them. Please note that all existing data will be lost.2(Keep Existing Data) [Recommended]: If resources already exist, it safely preserves the data and only links the connection information.
- Upon completion, the newly issued unique DB and KV IDs are automatically updated in each configuration file (
wrangler.json) of the monorepo.
Step 4. Pre-create Web Projects
- To improve deployment reliability, it pre-registers and reserves empty web projects on Cloudflare Edge.
- If a domain with the same name is already occupied, it reuses the existing domain and automatically transitions to the next step safely.
Step 5. Remote Sync of Secrets
- Safely uploads and synchronizes the secret values, such as the master password written locally in
.dev.vars, to Cloudflare. - Automatic Access IP Registration: Especially in this step, it detects the public IP address of the administrator's computer running the deployment in real-time and automatically injects it as the
ALLOWED_IPvariable. This prevents the administrator from being blocked upon accessing the login screen immediately after deployment.
Step 6. Database Table Configuration & Default Theme Setup
- Configure the database tables needed for the blog to function and inject default settings.
- Following the on-screen prompts, choose your primary language (Korean, English, Japanese). This sets up the translation system, sample categories, header menu structure, and a default welcome post automatically.
Step 7. Build Web Services & Final Deployment
- Performs the integrated build of all monorepo apps and automatically runs the deployment command to Cloudflare servers to complete the installation process. Once deployment is complete, the Pages URLs for both the blog and admin will be displayed.
[!TIP]
💡 Automatic Secret Settings and Immediate Connection Support
The installation process of this project seamlessly handles resource creation, web project provisioning, and secret environment variable transmission.
Upon completion, the login password and IP permission settings are perfectly configured on the remote server, so it works immediately without any additional manual configuration.
🔄 4. Blog Update & Data Restore Deployment (npm run restore)
When a new patch version or a bug-fixed release code is deployed while running your blog, this process allows you to safely transfer your existing post data and URLs without data loss while replacing the screen with the new code.
💡 4-Step Migration Procedure for New Versions
You can safely complete the upgrade without data loss by using the admin data backup and the npm run restore command.
- [Step 1] Backup Existing Data & Deployment Settings:
- Access the
Backupmenu and the backup section at the bottom of theTheme Editormenu of your active admin app, and download the post content data and theme design settings to your computer respectively. - Also, click the 'Download Settings Backup' button in the
Backupmenu to save the [wrangler.backup.json] file to your PC. (This is the most critical file for maintaining the link to your existing production database's unique ID.)
- Access the
- [Step 2] Isolated Testing of New Code:
- In the newly downloaded version's code folder, run
npm run setupand enter a temporary DB for testing and a temporary Pages deployment name for testing to deploy it separately. - Log in to the newly deployed test admin, and import the backup data files saved in Step 1 to verify that the data loads successfully in advance.
- In the newly downloaded version's code folder, run
- [Step 3] Restore Bindings to Existing Production Server (
npm run restore):- Once verification is complete, copy and paste the
wrangler.backup.jsonfile saved in Step 1 into the root directory of the new version's project folder. - Run the
npm run restorecommand in the terminal. The tool script will read the existing production DB and KV unique ID information written in the backup file and automatically connect them to the new code's configuration files via override.
- Once verification is complete, copy and paste the
- [Step 4] Schema Synchronization & Override Deployment:
- The restore script safely updates only the table structure schema of the existing production DB to the latest specifications, so actual posts or data already stored will not be corrupted or deleted and will be perfectly preserved.
- Next, run
npm run deploy:blogandnpm run deploy:adminrespectively. The latest upgraded blog system will be safely deployed, overwriting the system while keeping the same URLs you were using.
📦 5. Backup File Types and Functions
Refer to the table below for the roles of individual files that can be safely imported and exported from the admin backup menu.
| Backup Type | Extraction Path | Recommended Filename Example | Detailed Feature & Preserved Content |
|---|---|---|---|
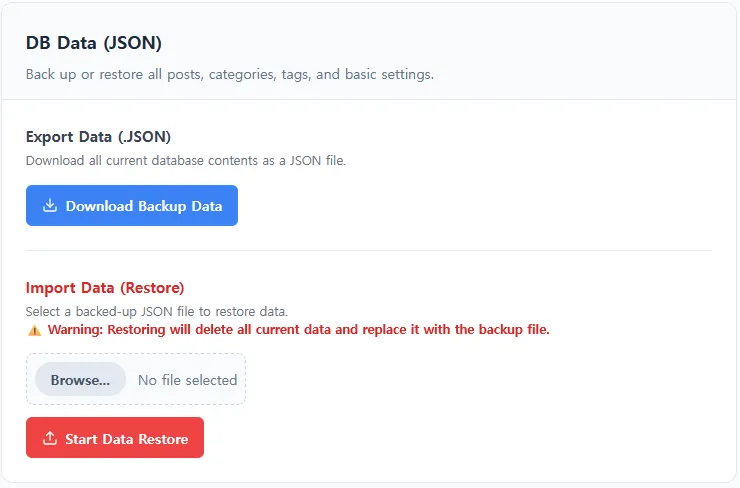
| 1. Content DB Data | Backup Menu |
blog-content-backup-[date].json |
Preserves all written blog post content, created category information, tag lists, and basic system settings. |
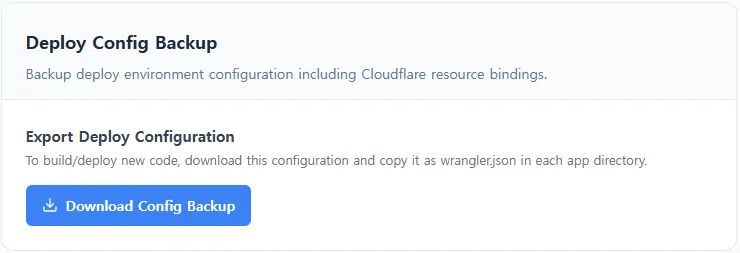
| 2. Deployment Config Backup | Backup Menu |
wrangler.backup.json |
Safely preserves the deployment name and unique UUID information required for Cloudflare D1 DB and KV storage binding (Essential for server migration). |
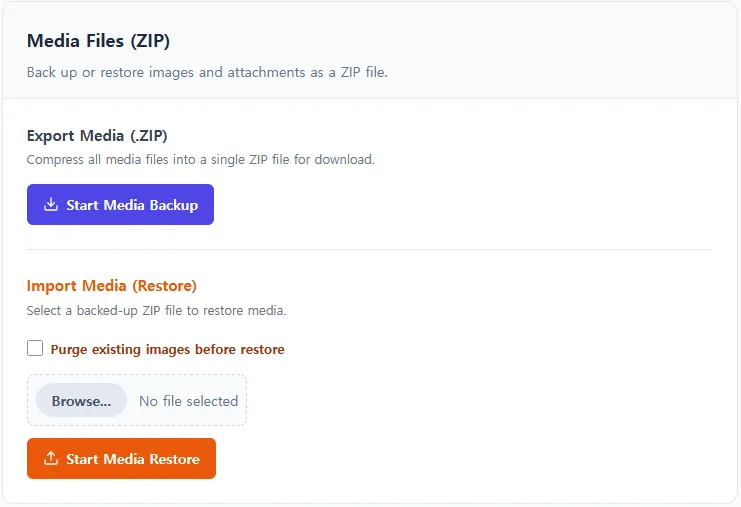
| 3. Media File Backup | Media Backup & Restore section in the Backup menuor [Backup / Restore] button in the top right of the Media Library menu |
[storage-name]-images-backup-[date].zip (e.g., r2-images-backup-[date].zip) |
Downloads and preserves all image media files uploaded to the active image storage (R2, Supabase, etc.) as a ZIP file. |
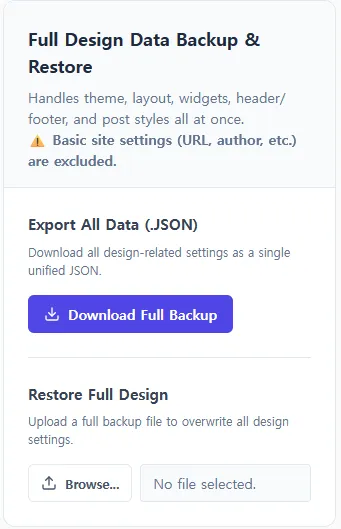
| 4. Design Settings Backup | Bottom of Theme Editor menu |
blog-design-backup-[date].json |
Preserves blog theme color information, background types, and device-specific (desktop/mobile) widget layout structures configured in the Theme Editor. |
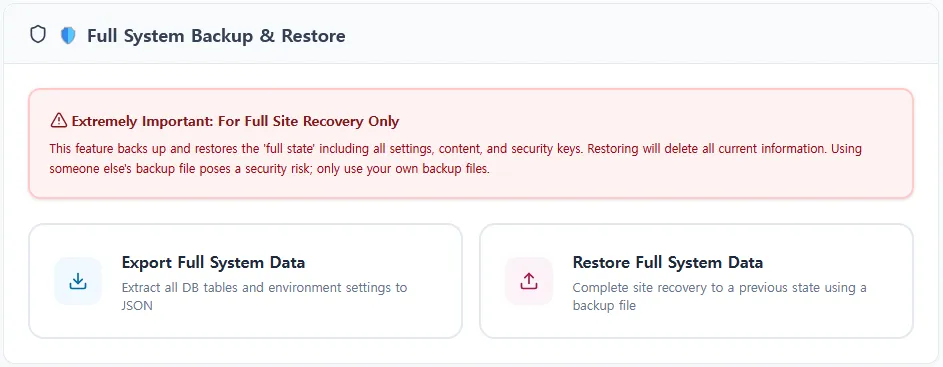
| 5. Full System Backup | Bottom of Site Settings menu |
full-system-backup-[date].json |
Gathers raw data of all tables from both databases (BLOG_DB, USER_DB) into a single JSON file for a complete backup and restore. |
0 Comments
Login is required to write comments.